
Photography in the time of Coronavirus
Dear friends, we would like to take this opportunity to reach out and let you know that we share your fears, anxieties and concerns through these difficult days. With the recent outbreak of the Coronavirus and subsequent shockwaves that have reverberated around the world, and the drastic and unprecedented methods taken to control it, professional and hobbyist photographers alike have had to adjust their photographic routines and schedules accordingly, at least for the near future. Wandering around my home town over the last few weeks, with all non-essential businesses and schools closed feels eerily silent. Supermarkets however, are crowded with shoppers wearing respiratory masks and the seemingly obligatory purchase of toilet rolls in their trolleys. The whole scenario looks like something straight out of a Hollywood apocalyptic movie. We are confident that together we will overcome this affliction and get back to doing what we love – creating beautiful images. Rather than spending your day stressing over the news or binge-watching on Netflix, a far more productive way of spending your time at home is to try a few of these ideas listed below, so that you can hit the ground running when things get back on track.
Organise your files to date
The process of organizing pictures is a time-consuming, but crucial task. Keeping your images organized and backed up will save you a lot of time and headache in the future. Therefore, it is essential that you do it properly early on and keep a consistent system in place. Photographs are our precious memories frozen in time, and we simply cannot afford to lose them. You have most likely accumulated thousands of images over the years. Those images are probably scattered all over the place – some on your phone, others on your computer. And if you previously ran out of storage, you might have dumped some onto an external drive as well. Once you’ve captured your images, you will need to organize them on your computer. The best ways to organize photos on a desktop is by creating a folder structure that is meaningful and easy to navigate. This is an essential step to keeping your images organized and being able to find them later. Personally, I like to do everything manually, but you can have your favorite software do this for you as well. I create folders one by one within a larger structure and copy my files into them after every shoot. It may not be the best method for everyone, but this one works for me: Firstly, I have all images taken that particular year included into 1 folder, for example: 2019. Within that folder I have separate folders named: RAW files to edit, Raw files edited, TIFF files edited, JPEG files. My JPEG images are ones that are shown online or forwarded to my portfolio on my iPad, while the TIFF images are used in case I want any of those images printed.
Back-up everything
Backing up your photos is one of the most important yet overlooked elements for beginner photographers. There seems to be a trend where advanced amateurs and professional photographers have experienced the pitfalls in overlooking this in the past and have learned the hard way, but never again! Since the rise of digital photography, this simple task can not be overstated. Now that we have RAID configured external drives, this task could not be made any easier. Personally, I use the Lacie Big Dock drives and have mine configured so that one drive mirrors the 2nd drive in case a drive fails. Simply put, an 8TB drive becomes 2 identical 4TB drives. When I run a multi-day photo workshop, each day I download the images to an external drive [with day number stated on a separate file]. I back this up onto a disc-on-key drive, then reformat my memory cards. When I get home, all files are then downloaded onto the Lacie drive for me to work on. For other photographers, they may find that a 2nd or 3rd backup on Network storage or Cloud storage gives them peace of mind. One significant benefit of both Time Machine and Windows Backup and Restore is that they run automatically in the background so you never have to think about it once you set them up. However, one drawback is that because they only backup to external hard drives, if you lose data to a catastrophic event such as a fire or flood, chances are your backup drive will be toast also. For that reason it is a good idea to have one copy of your backups in a separate location to avoid the nightmare scenario in case of a flood or fire.
The great challenge with backing up your digital images is that all methods have their positive and negative aspects, no one single solution is best. And very few things in life are truly permanent, so even if you physically print your pictures they will eventually fade and will also be susceptible to mold, moisture, or physical damage. Any digital backup option is better than none at all. If you leave your photos on your computer or phone without duplicates then you are at risk of putting all your eggs in one basket which is almost certainly guaranteed to fail. The solution, then, is to do something to make sure your pictures don’t meet a premature digital demise. It could be a second hard drive, a cloud-based solution, making a Blu-Ray disk, or using a combination of all three.
Research post processing techniques online
Whether you shoot in RAW or JPEG format, you are probably going to have to do some level of post-processing to your images. While some photographers prefer to shoot in JPEG thinking that they will avoid spending time on their computers, minor edits, cropping, healing, colour correction etc are vital when your favourite shots captured require it. Shooting in RAW however, gives the photographer a far greater degree of latitude and flexibility to retouch images, so is favoured among most serious photographers. There is also the option of shooting in JPEG + RAW, which has obvious benefits in being able to work on quality shots when the occasion arises. The electronic sensors in our current digital cameras are pretty amazing, but very far from perfect. They are improving significantly with every new generation, but the signal coming out of them is not “clean.” Part of the valuable technology inside your camera is the algorithms built specifically to compensate for this. When comparing a JPEG to an un-processed RAW image, the RAW looks “soft” (slightly out of focus or lacking detail), “flat” (the difference between black and white is not as big as it should be, the colors are drab), and have other issues that need to be fixed. But when RAW images have been processed to bring out their best, the results can be astounding. When choosing which RAW converter and editing software to use, things can often get confusing. With the amount of options now available, reading about what is out there online will help you narrow down to what works best for you.
Firstly, you will need to decide on how much time and effort you are willing to spend in order to gain confidence on using a particular software. Retouching digital images can be a steep learning curve, so a certain amount of patience will be required in order to learn a programs’ extensive list of features. For photographers looking to do simple, basic adjustments without delving into too many features, Adobe Photoshop Elements was a popular choice for many years. On the other hand, professional and serious enthusiast photographers may want to look into using something like Phase One’s Capture One program. This software uses a different type of interface to that of the highly popular Adobe Lightroom program, so photographers switching over will need to learn it from scratch. Another important note is where you plan to edit images. If you are going to need to edit while traveling for example, you may find that Lightroom CC is your best option with it’s ability to use on mobile devices. On the other hand, you may be adamant in using a software that carries a subscription. The subject of post-production is probably more complex than the cameras themselves, so it is worth devoting time to it. Many guests on my tours and workshops ask me which method I use. As the pattern array on the sensor of my Fujifilm cameras is different to other brands, I aim to achieve the highest quality of RAW conversion through a different way to most. Firstly, I process the RAW image through Iridient Developer which is then exported as a 16 Bit TIFF. I don’t make any changes in Iridient itself, unless I need to retrieve details with the highlights recovery tool [this is the best software I have used for retrieving details]. The TIFF file is then sent to Exposure X4 [previously called Alien Skin], where I work on the image and output a file in TIFF as well as JPEG. And that’s it! As opposed to learning photography and how to capture images out on location, taking online classes for post-processing, or even just watching videos on Youtube is where I feel that students can gain the most knowledge and stay up to date with current technology.
Enter your best work into photography competitions
With all this free time on your hands that you are probably now experiencing, this may be the perfect time for you to go through your best shots with the aim of entering them into photo competitions. Most, but not all photo competitions have different categories and themes. Some charge a fee to enter, while others are free. One of the things to be aware of when entering competitions are the copyright terms. Our recommendation is to avoid any contests that require you to sign over your copyright. Read the terms and conditions of all contests carefully. Note that allowing them to use your image for promotional purposes is not the same thing, and they do not need your copyright to do so – just your permission to use it for certain things. Signing over copyright means they will then have the right to sell your image as stock and make a profit from it and you cannot! Basically, they own it and can do whatever they want with it. So again, read their terms beforehand. You can also put your best foot forward when entering a photo contest by doing some simple, yet effective, research beforehand. For example, if the contest has been running before, you should check out who the previous winners were and what their submission entailed. This gives you a great idea of the type of quality the judges are looking for.
To summarise, entering you images forces you to be highly self critical of your work – causing you to narrow down your portfolio until only the very best images remain. Winning prizes are the goal of entering, though commended images will still gain exposure of your work. Apart from cash prizes to be had, photographic equipment, courses with renowned photographers and travel to exotic destinations can all be won. Likewise, just getting inspiration from other photographers work and the quality of images submitted can cause you to reflect on your own work and find your place as a photographer. Some photographers simply want recognition as an artist, or for marketing purposes. Contests can be a great platform in receiving this feedback. You can search for recommended photo contests online. You should make a note of deadlines for submissions and enter upcoming deadlines first. Here is a link to get you started: expertphotography.com/best-photography-contests/
Learn your camera model inside out
This is one of those aspects of photography that should be at the top of your list. Knowing your camera’s functions, location of settings and even it’s limitations will allow you to take of control of the image-taking process in a range of different subject, lighting and exposure scenarios. The difference between controlling your camera from automated settings can be a revelation. The first thing you will need to do is have a quick read through your camera manual. Nowadays, most manufacturers give the option of downloading a PDF of the manual that can be stored on your smartphone. Bookmarking specific pages that you will need to revert to sometimes can be very useful. An example of this are the many variations of autofocus options available. This can be handy when selecting between still shooting and action photography, as often a photographer will have their typical autofocus settings set, but occasionally leave their comfort zone when the scenario arises. If your camera has this feature, select the “My Menu” button and scroll through the entire menu to add your most used settings to it. Once this has been done, you will have a quick way to enable those settings, rather than scrolling through the entire menu system. Modern DSLR and Mirrorless cameras have a wide variety of customisation options by way of function buttons, custom buttons and other buttons that can be changed to run different duties than what is implemented.
Ideally, you should have your camera settings to mirror the type of photography you do. For example, street photographers will likely want Aperture priority, Auto ISO, burst shooting and exposure compensation functions easily available to use, while landscape photographers will likely prefer manually set ISO, manual exposure, single shot and even manual focus. The point is to have your settings ready for the type of photography you normally do, but to know how to navigate through the camera quickly and efficiently when the situation changes. Other features that are included in most modern cameras is the ability to shoot wirelessly through an App installed on your smartphone. This can be as useful as using it for discreet street photography as it can for composition and remote shooting for landscape and astrophotography. Likewise, knowing the limitations of your camera is just as important as it’s attributes. An example of this is the high ISO performance that your camera model can give. It is worth trying this out at different ISO settings in low light, so that you are aware of the limit that acceptable image quality can be reached. After this, you can decide at what point your Auto ISO or manual ISO can be set to. Update your camera’s firmware to keep your camera running at it’s best and to take advantage of faster running speeds, new features etc.
Update your portfolio
In general, a portfolio of a photographer’s work will be divided into two categories – the hobbyist and the professional photographer. While the hobbyist will generally use their favourite images, the professional is more likely to use images that target specific clients and more relevant to the latest trends. Likewise, the media that a portfolio is to be displayed on will either be paper prints, through an online sharing platform, or simply displayed on a notebook or tablet. Whether it is for hobbyists or professionals, I always recommend having a limit to the amount of images displayed, and being very conservative with selection. The point is to keep the viewers on the attention. So quality definitely rules over quantity in this case. Choosing a simple, do-it-yourself website builder platform can help you manage and update your portfolio easily, without any coding knowledge. There are many mobile-friendly templates available that are perfect for creating a professional photography portfolio website. Agencies and art directors will want to see the variety that you can create, so for professionals it is better to have a variety of themes accordingly. Personally, I love the simple and elegant design of Foliobook that I use on my iPad. You have a wealth of customisation options to design the layout. I have mine set to 3 categories – People, Environmental [environmental portraits] and Places. I try to organise images so that they work well according to the previous and next images. Likewise, the colour and Black and White images are placed separately, as well as portrait or landscape orientation. This way the viewer does not have to continuously keep turning the iPad. I believe in consistency, and images shown as a series, rather than a mishmash of anything and everything. Just imagine how much more professional it looks when you see a series of images in a photo exhibit that work well together, and you will get the idea. For example, a few high quality images of minimalist landscapes, or tightly composed shots of flowers, or black and white street photography is going to have far more impact to the viewer than a mix of all of them.
Personally, I love to see images printed on paper, and feel like the image is not really complete until it has been printed. I actually prefer to touch the paper, rather than having the images mounted and framed. That’s why some of my favourite work is printed and stored in acid-free storage boxes. I love to see the depth and detail as well as feel the texture of a well printed photograph. My own preference in viewing images in this way is using the A2 size print [42.0 x 59.4cm or 16.53 x 23.39 inches]. It is just the right size for the regular viewing distance and easier to store the boxes away.
Get your images online
Photography has come a long way, and even more so in the digital age. It has never been easier to view other’s work or have your work viewed. The flip-side of this are the vast amount of images now found online. So how do you get exposure of your work when there is so much competition? The key is social networking. The more your images are shared, the more chance you have of others viewing them. Pinterest, 500px, Facebook, Instagram, Youtube, but to name a few can all be used to direct audiences to your work. Naming your images is very important so that they show up in search engines, and adding hashtags is now common practice in order for viewers to search for images within specific groups. It’s not only best SEO practice to have your name in the file title, but it will also allow you to be seen as a photographer. Also, to keep the viewer or Art Director from losing patience, don’t upload large files as this will slow down the loading time for pages to open. One of the mistakes made with portfolios is when photographers upload huge files as they want the quality of their images to show up. Reduce the file size and speed up your site and you’ve just improved your photography portfolio!
As a photographer, you can easily earn some extra cash (or even start a new career) if you know the right places to sell your photos online. Photographers of various skill levels are in high demand for their work, now more than ever. Everyone from large corporations, small and medium size businesses to bloggers, graphic designers, marketers and publishers buy and use photos regularly online. Selling directly from your website or using a stock agency may be the way to go. You should read the extensive terms and conditions from stock agencies beforehand, as in contrast to selling images directly from your website with 100% profit, stock agencies can take between 20%-70% commission as well as forcing you to give them exclusive rights to your images. One of the options worth exploring is using 500px for your online galleries, while selling images through their site at the same time. This free site boasts a “Pulse algorithm” that increases your exposure by adding your new uploads to a Discovery page, which is viewed by thousands of visitors each day.
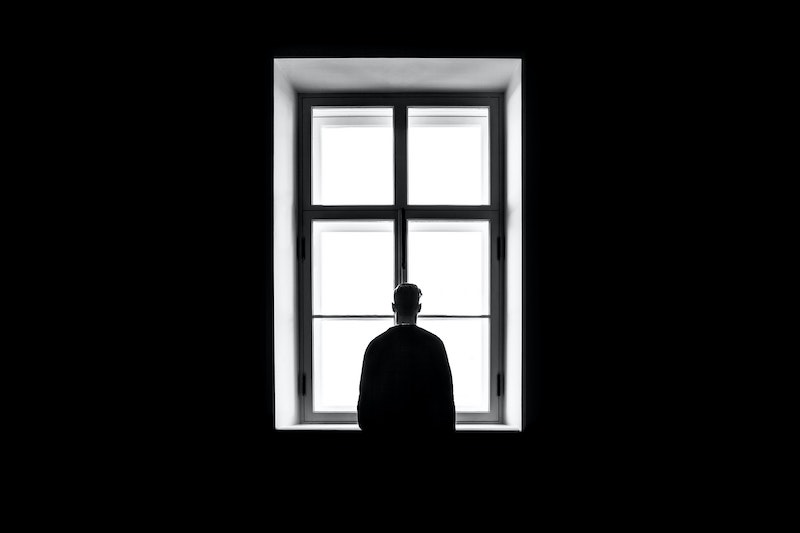
Practice artificial and natural lighting techniques
Being stuck at home, you will have plenty of time to practice artificial and natural directional lighting techniques. Probably my favourite type of lighting for portraits is simple window lighting. Watching how the lighting changes according to the position of the sun over the course of a day, and practicing with harsh directional lighting diffused through curtains, or the soft light on a cloudy day is a great way to practice using different camera settings for this purpose. Due to the high contrast between the light source and a dark interior, this type of lighting is a good way to try out your camera’s spot meter to get the subject’s face correctly exposed. If you wish to add some background context to a portrait, you can use a wider lens and also experiment with flashguns and LED strobes placed in different locations and with different power settings. Using window light for portraits combined with some artificial fill-light is a great way to practice balancing the light sources to the effect you like. You may want to use a dark cloth behind the subject to add more visual impact by directing the eye towards the subject, and reflectors can also be used to fill in any unwanted shadows. Combining a high enough shutter speed to reduce movement blur, a low enough ISO to limit noise, a fast prime lens to blur backgrounds and a tripod to compose and maintain sharpness, you can learn a lot of portrait photography techniques for future use.
Another popular type of subject to shoot nowadays is food photography, especially given the popularity of all the reality food shows on TV. To do this successfully, firstly, you will need to remember that what’s important is how the food looks, not how it tastes. Presentation is key, so the angle to shoot from, focal length, backgrounds and of course, lighting all play their part. There are entire books devoted to the topic of how to style food for a photography shoot. The food industry is huge and they understand the importance of great photography in selling their wares. Now, if you’re serious about getting great shots then you need to prepare the food to look its best. The surroundings that your food appears in are almost as important as the food itself. A well designed setting can give context and mood to your shot so think about it a little. Regarding lighting the subject, if you don’t have it yet, you should definitely purchase a diffusor and place it between the window and your table. When working with direct sunlight, a diffusor will improve the quality of light a lot by making it softer. Softening dark shadows will instantly make your food shots much more appealing. In most cases, a simple window will be all you need to create beautifully diffused back or side light. Lighting from the back or side will create dimension and highlight the textures in the food.
Find inspiration in your favourite photo books
If some inspiration is what’s needed for when you do get the chance to go out to photograph, a great way to stir the imagination is to look through photography books of your favourite artists to get the creative juices flowing. Flicking through images of some of my favourite photographers from my teen years reminds me of why I was so instantly hooked in the first place. Some images are so ingrained in my memory that they have been the key to me taking the type of images that I do. Certain images that I remember from as far back as 30 years from the likes of Sebastio Salgado, Fan Ho, Eliott Erwitt, Steve McCurry, Saul Leiter, and so many others are just as relevant to me now as they were then. There’s nothing quite like seeing photographs in printed form, perfectly curated within the pages of a bounded book. From publications that teach you about the process of photography to works of visual literature created by professional photographers. There is an endless array of books that inspire us to push and expand the limits of our creativity.
Apart from the concept of learning the art of photography, there is a vast selection of publications dedicated to the visual creation of images. These are essential tools for strengthening your photographic eye. Photography books give us useful information for our own personal shooting techniques. For those who are self-taught or even looking for a more comprehensive focus on one particular area of photography. There are guided books to allow a photographer to develop new techniques or even enhance existing ones, and technical books designed to aid the photographer in his or her particular camera model. Although they make for a stunning array on your coffee table, photography books contain truly valuable and essential information. Photography books expand outside the realm of visual appeal. Likewise, going through books containing stunning images can get you inspired to start printing your own books!